EKS
Deployment instructions for NannyML Cloud on AWS EKS
NannyML Cloud is available on the AWS marketplace as a helm chart that can be installed on a Kubernetes cluster. This page provides deployment instructions and describes configuration options for customizing your NannyML Cloud instance.
If you prefer a video walkthrough, here's our AWS Setup YouTube guide:
Prerequisites
Before deploying NannyML Cloud in your AWS account, you will need to prepare:
A few tools to configure the Kubernetes cluster
AWS CLI configured with appropriate credentials for the account you wish to use
eksctl to manage the EKS cluster
kubectl to read information from the EKS cluster
helm to install the NannyML Cloud helm chart
If you don't already have these tools installed locally, we recommend using AWS CloudShell. It comes with the AWS CLI and kubectl preinstalled and configured. Using AWS CloudShell you will only need to install eksctl and helm using the commands below to get started.
Note AWS CloudShell may ask you for confirmation to execute multiple lines when copy pasting this command. This can safely be accepted.
An Amazon EKS cluster
The AWS documentation provides a step-by-step guide to create a cluster if you don't have one yet.
Node size is free to choose, but we recommend 2 nodes using t3.large or t3a.large instance as minimum.
The cluster can be shared with other applications if desired.
Amazon EBS CSI driver on the cluster
The databases used by NannyML Cloud are run inside of the cluster. Data is persisted in Elastic Block Storage.
Just want to try things out using the default configuration? Use our quick start instructions to set up a cluster.
AWS Marketplace subscription
To access NannyML Cloud, you will need to subscribe to the NannyML Cloud Trial offer on the AWS marketplace. This grants you access to use a 30-day scale trial license. It is free to subscribe and use, but once the trial license expires you will need to purchase a license to continue using the software.
To get started, click the Continue to Subscribe button on the marketplace offer.

Deploying the software happens outside the marketplace, but subscribing is required to get access to the software.
Identify software version
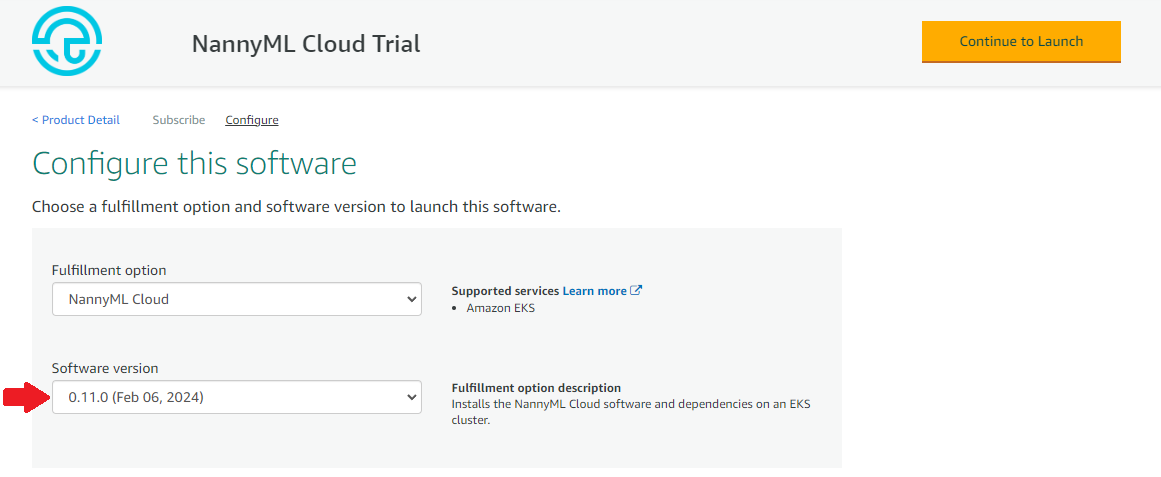
Select the Helm chart option for NannyML Cloud and find the software version you wish to use. We recommend using the latest version available for the best user experience. Then follow the instructions in launching the software to create your NannyML Cloud instance.

Launching the software
Step 1: Create an AWS IAM role and Kubernetes service account
To deploy NannyML Cloud from AWS Marketplace, you need to create a Kubernetes service account with appropriate IAM permissions for communicating with AWS License Manager. When launching the software it will attempt to acquire a license from AWS on start-up. In case no license is available, the software will fail to start.
To set up the service account you'll need to execute these steps:
Create an IAM role with AWS-managed
AWSLicenseManagerConsumptionPolicy.Create a K8s service account named
nannyml-cloud-service-accountin your Amazon EKS cluster.Set up a trust relationship between the IAM role and the K8s service account.
Modify
nannyml-cloud-service-accountannotation to associate it with the created IAM role.
Your Amazon EKS cluster needs to have an IAM OIDC provider enabled to associate a Kubernetes service account with an IAM role. If you've installed the Amazon EBS CSI driver prerequisite this should already be enabled. See Creating an IAM OIDC provider for your cluster for more information.
We recommend doing this via eksctl. The commands below automate these steps. Start by defining the EKS cluster name.
Then run the command below to create a K8s service account with access to AWS License Manager.
Step 2: Download NannyML Cloud helm chart
Define which version you would like to install. The list of available versions can be found on the configure step in AWS Marketplace. We recommend installing the latest available version for the best user experience.
Login to grant helm access to the images hosted on AWS Marketplace, then pull the appropriate image.
Step 3: Deploy NannyML Cloud with attached IAM role
Optionally define a custom URL where you want to make the application available. If provided, we'll configure an ingress and attempt to get a certificate for the domain. Once the application is deployed, you will need to make a DNS registration so that the URL points at the appropriate AWS elastic load balancer. If you do not provide a URL, we'll use a self-signed certificate to enable HTTPS on the AWS elastic load balancer URL.
Deploy NannyML Cloud using the following command:
The serviceAccountName argument provided has to match the service account name created earlier. If you used a different name in step 1, you will also need to update the argument here.
It usually takes around 2 minutes for the helm command to complete. When completed the kubernetes cluster will spin up all the required containers and allocate block storage on AWS. It will take another 2-3 minutes for the NannyML Cloud instance to be fully operational.
Step 4: Accept trial license
The trial license is issued to you when the software is deployed. Depending on the policy configured for your AWS account, it may need to be accepted in the AWS environment before it can be used.
Access the list of licenses granted to your account on AWS License Manager. You should see a license for NannyML Cloud issued by NannyML as shown in the screenshot below. When the license is newly issued, it will be in Pending acceptance status.

It may take a few minutes for the license to become available as it is granted when your NannyML Cloud instance has started.
Click the License ID column to view details for the license. Next click the Accept & activate license button in the top right and follow the instructions in the pop-up to activate your trial license.

The trial license comes with a few limitations:
Only one trial license is allowed per account. Once it has expired, you will need to purchase a license.
Delaying the license activation does not change the expiration date. It will expire 30 days from when it was issued, regardless of activation.
Only one NannyML Cloud instance can be active at a time using the trial license. When purchasing a license, you can opt to buy multiple licenses, enabling multiple instances.
Step 5: Access your NannyML Cloud instance
Your NannyML Cloud instance should now be active on your EKS cluster. It is automatically exposed using an Amazon ELB (Elastic Load Balancer) with a dynamically generated URL. Run the command below to identify the ELB URL for your instance.
If you entered a custom URL in step 3, you should now set up a DNS CNAME record to direct your chosen URL to the ELB URL generated by AWS. Exact steps for this depend on your DNS provider. If you're unfamiliar, please check your DNS provider's documentation or ask your IT administrator for help.
Once the CNAME record has been created a certificate will be generated by Let's Encrypt and stored on the kubernetes cluster. This process could take a few minutes. Once completed, your NannyML Cloud instance is available at your configured URL using a secured HTTPS connection.
Access the application at the returned URL, e.g. https://a424a15820a2e40b9b2395b54299d674-444730227.eu-central-1.elb.amazonaws.com/
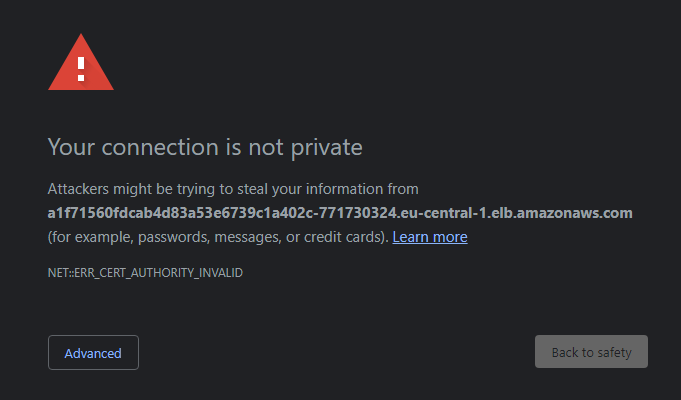
⚠️ When accessing the dynamically generated URL you may see a security warning such as shown below. This is expected because the application is using a self-signed certificate for that URL. You can proceed to the application by bypassing the warning in your browser.

Unfortunately we cannot get a certificate from a certificate authority for these URL's as they are ephemeral. If you were to shut down your NannyML Cloud instance, AWS may assign that URL to someone else. If you had received a certificate for it, you would now hold a certificate to someone else's website which is of course undesired.
The solution to this issue is setting a custom URL in step 3 when configuring your NannyML Cloud instance. With a URL you control we can obtain a certificate from Let's Encrypt and have a secure HTTPS setup.
Updating the software
Once NannyML Cloud has been deployed on EKS, you can update to a new version by deploying a new helm chart on the kubernetes cluster. To install an update:
Make sure you have an environment available with the kubernetes tools described in the prerequisites section, or install them into AWS CloudShell.
Download the helm chart for the new version as described in step 2.
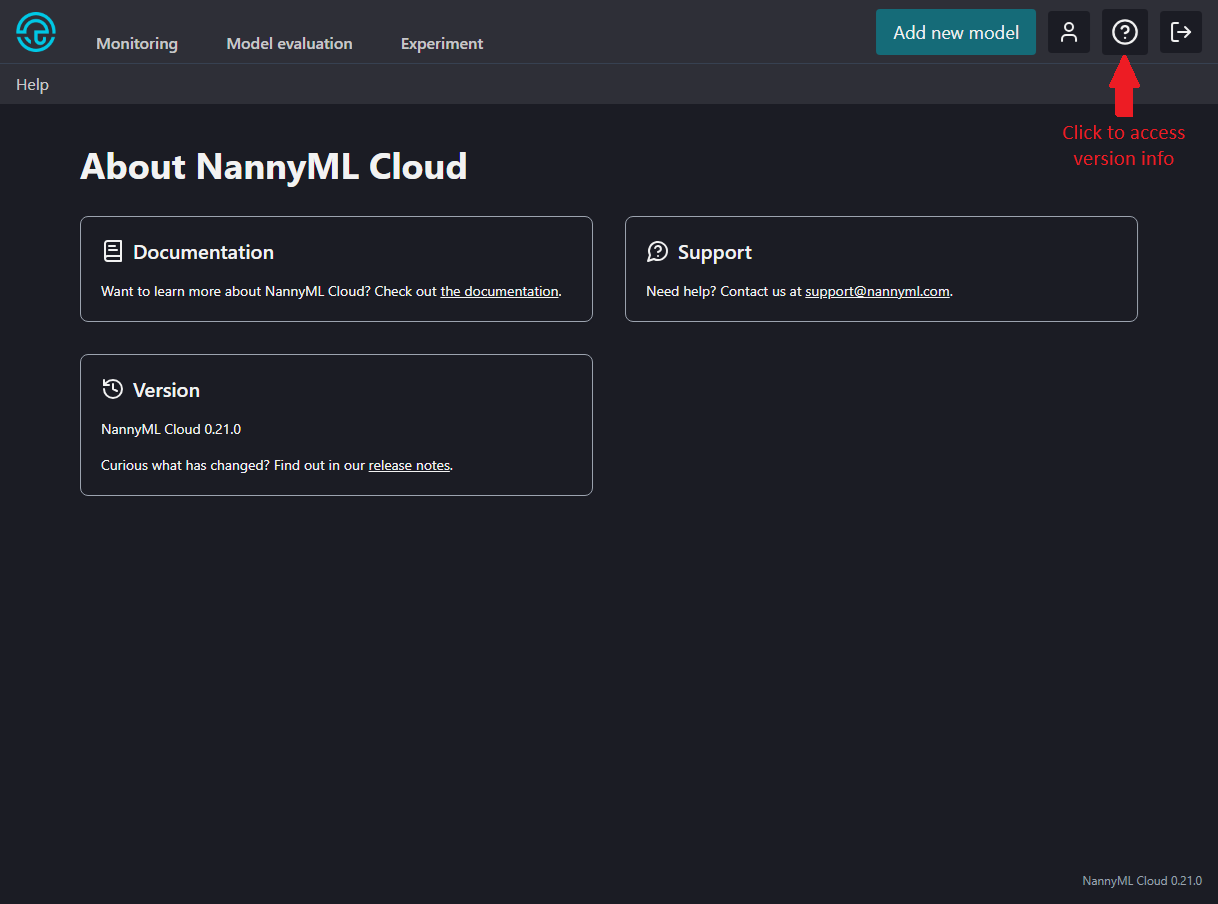
Optionally verify the new version is active in the UI. The helm chart version should match the version number displayed.

Version info in NannyML Cloud
After a few minutes the new version should be operational. If you used the same URL as in the original deployment, you can continue to use your NannyML instance without any changes.
Your NannyML Cloud instance will remain available using the old version during the update process. Once the new version is ready, kubernetes will switch over network traffic to the new version without any downtime. However, any active NannyML runs at the time of update will be cancelled. Those runs will then need to be restarted after the update.
We try to ensure all updates are backwards compatible so that all of your data will be retained. However, some updates may require significant changes that are not fully backwards compatible. This will be clearly specified in the release notes, including a description of how to update your existing models in NannyML Cloud so that no data is lost.
Getting a new license when your (trial) license expires
When your (trial) license expires your NannyML Cloud instance will shut down. All data will be preserved and remain unchanged from the moment the license expires. You will then need to purchase a new license for your AWS account to restore operation.
Reach out to [email protected] to for more information.
Last updated