Azure Managed Application
Deployment instructions for NannyML Cloud as a managed application on Azure
NannyML Cloud is available on the Azure marketplace as a managed application. It will provision the NannyML Cloud components and the required infrastructure within your own subscription. This page provides deployment instructions and describes the available configuration options to customize your NannyML Cloud instance.
Prerequisites
Have an Azure account with an active subscription.
If you prefer a video walkthrough, here's our Azure Setup YouTube guide:
Finding the NannyML Cloud managed application
To deploy the NannyML Cloud managed application, we'll first have to find it in the Azure marketplace.
Sign in to the Azure portal.
Search for Marketplace and select it from the available options. Or if you've recently used Marketplace, select it from your recently used services on top.

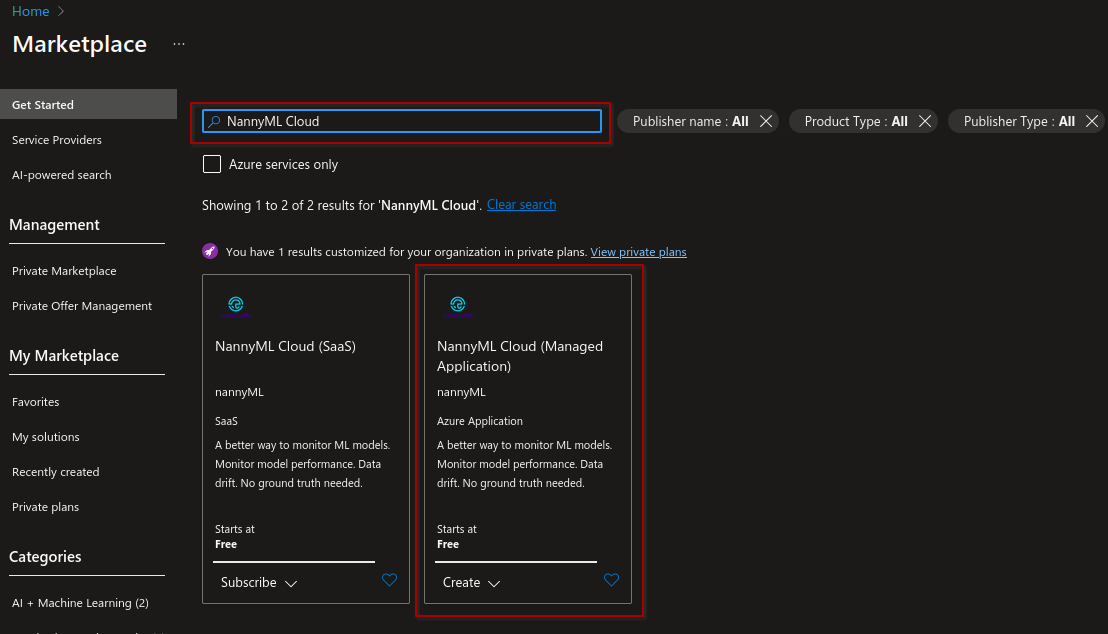
Finding the Azure marketplace On the Marketplace page, search for NannyML Cloud. You might notice two results: one for our Software-as-a-Service (SaaS) offer and one for our managed application offer. Make sure to select the one marked as Managed Application. Click the highlighted result or the Create button located at the bottom.
Finding NannyML Cloud in the marketplace Review the product and pricing information. Note that we currently only offer the NannyML Cloud managed application with a Professional plan. When you're ready, click the Create button to start the deployment wizard.
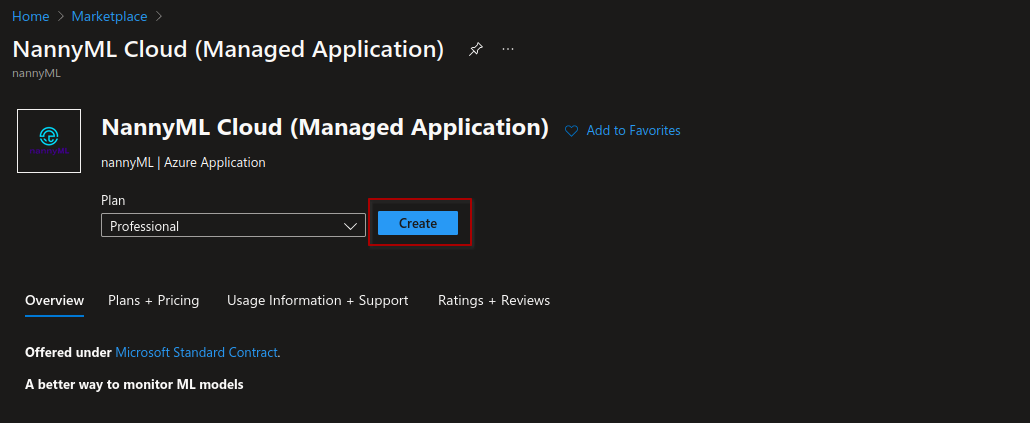
Starting the creation wizard
Deploying and customizing your instance
Basics settings
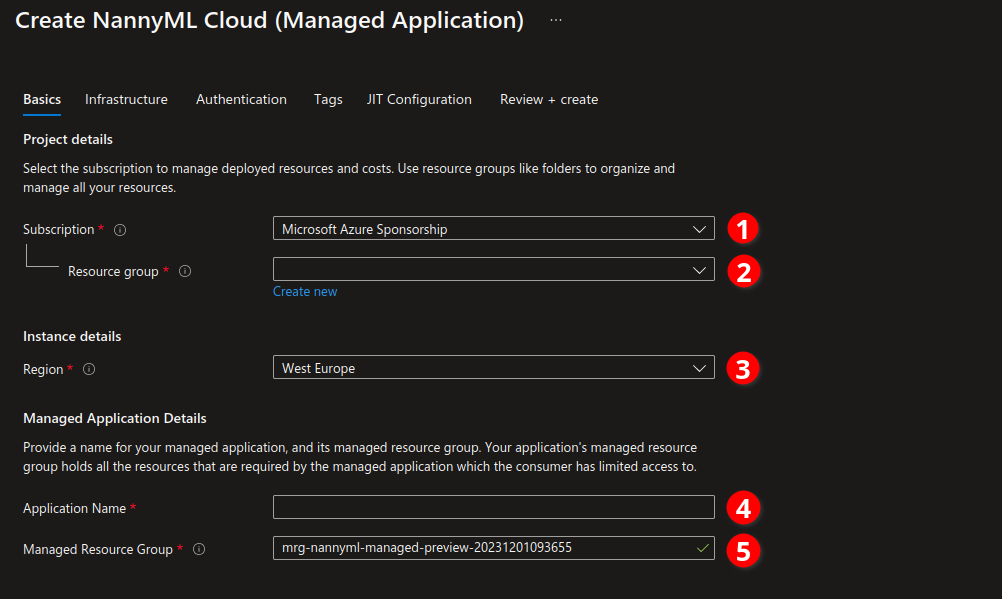
In this first form, you'll have to configure some Azure basics:
Subscription: use the dropdown box to select an eligible subscription. The NannyML managed application will be billed using the billing methods associated with this subscription.
Resource group: select an existing or create a new resource group to house the managed application resource. The managed application itself will create two more resource groups to house the internal infrastructure. See the Engineering page for more details.
Region: select a region supported by Azure to house your managed application resources.
Application name: choose a name for your managed application.
Managed resource group: you can set a name for the resource group that will be created to hold the infrastructure created by the managed application. A value will be suggested for you, so setting this manually is optional.
Infrastructure settings
NannyML Cloud is running on a Kubernetes cluster under the covers. You can tweak some of the cluster settings that directly impact the infrastructure cost.
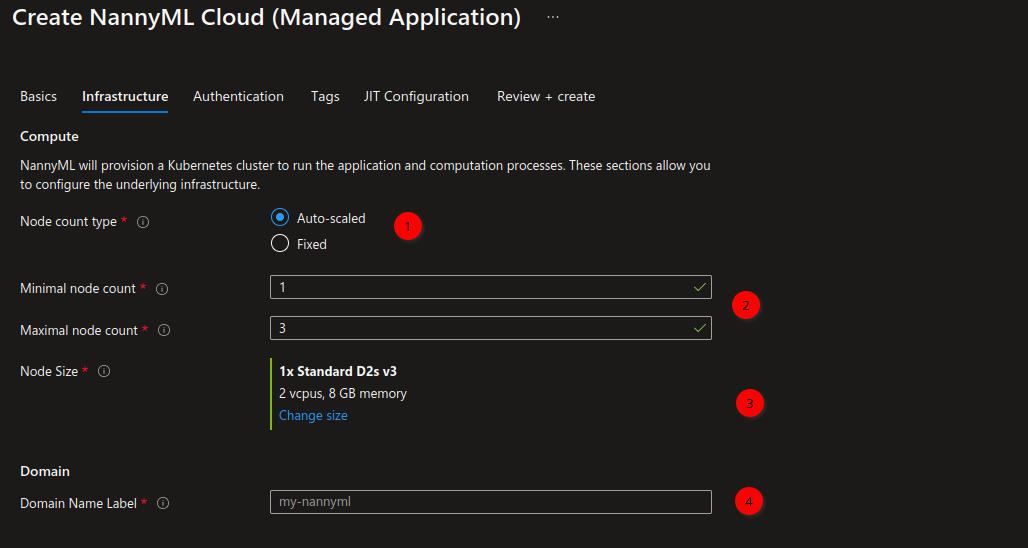
Node count type: you can select one of two options here.
Auto-scaled: this will enable the cluster hosting NannyML cloud to scale dynamically according to its workload.
Fixed: this will run the cluster on a fixed amount of nodes.
Provide node count values, depending on the option selected in step 1.
Minimal node count: the minimal amount of nodes your cluster will scale to. It should be at least 1.
Maximal node count: the maximal amount of nodes your cluster will scale to.

Options for a fixed node count Node count: the fixed number of nodes for your cluster in case.
Node size: choose a size for the virtual machine that will host your Kubernetes node. Take into account that the Kubernetes processes require some resources as well.
Domain name label: provide a label used to expose your application. NannyML will be available at the following URL after provisioning completes:
https://<domain-name-label>.<region>.cloudapp.azure.com. A full example would behttps://nannyml-managed.westeurope.cloudapp.com.
The defaults for Kubernetes cluster node count and size are our recommendations for small to medium workloads consisting of up to 10 models. Auto-scaling is recommended as it provides a more future-proof option. When trying out NannyML Cloud a fixed single node is sufficient.
The domain name label must be unique across your region. The form will enforce this.
Authentication settings
There are three options for authentication in NannyML Cloud:
Basic authentication: this setting allows you to provision your own users by specifying an email address and associated password.
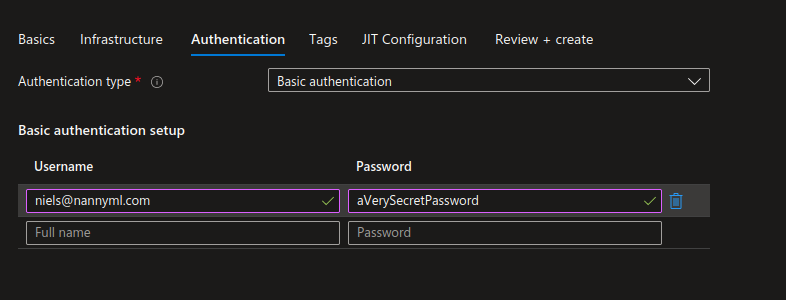
Provisioning users for basic authentication Azure Entra (Active Directory): this setting allows you to integrate NannyML Cloud with Azure Entra for authentication. This requires registering NannyML Cloud as an application in Azure Entra.
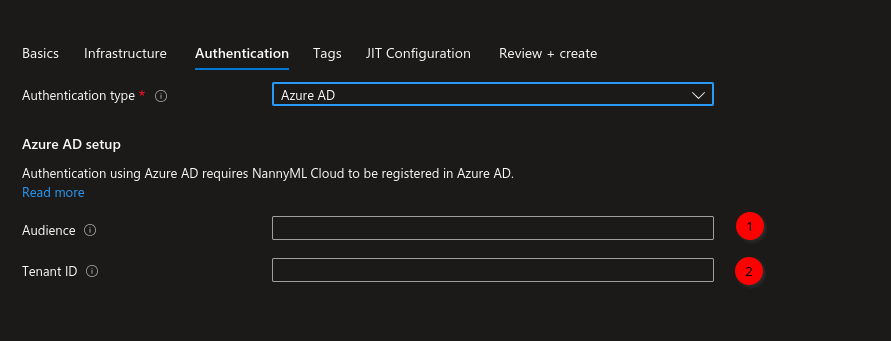
Setting up integration with Azure Entra (Active Directory) Audience: the identifier of the application that was registered in Azure AD. Denoted as the
appidTenant ID: the identifier for the tenant where the application was registered for in Azure AD
None: don't have any authentication enabled at all. Navigating to the managed NannyML Cloud instance will take you directly into the application.
Just-In-Time (JIT) access
The following section allows you to set up and configure Just-In-Time (JIT) access. Since NannyML Cloud is provisioned as a managed application, the NannyML support team has direct access to the infrastructure that has been created. This will only be used during support interventions or remote updates.
In case you'd like to restrict the automatic access, you can enable JIT access. This allows the NannyML Cloud support team to launch a request for access that you can then approve for a period of time. Only then can your managed NannyML Cloud instance be accessed by a remote NannyML support team.
You, the customer, do not have access to the underlying infrastructure of NannyML Cloud.
Disabling JIT access does NOT revoke access for the NannyML support team. It merely indicates that you don't require the NannyML support team to explicitly request access.
To enable JIT access, you should have an Azure Entra P2 license. Enabling JIT without having this license will severely disrupt the support flow.
Review and create
Now, you can review the selected plan and deployment options. Any required configuration values that are missing will be indicated in the wizard. You'll be asked to agree to the publisher, the NannyML support team, having access to the infrastructure provisioned on your subscription.

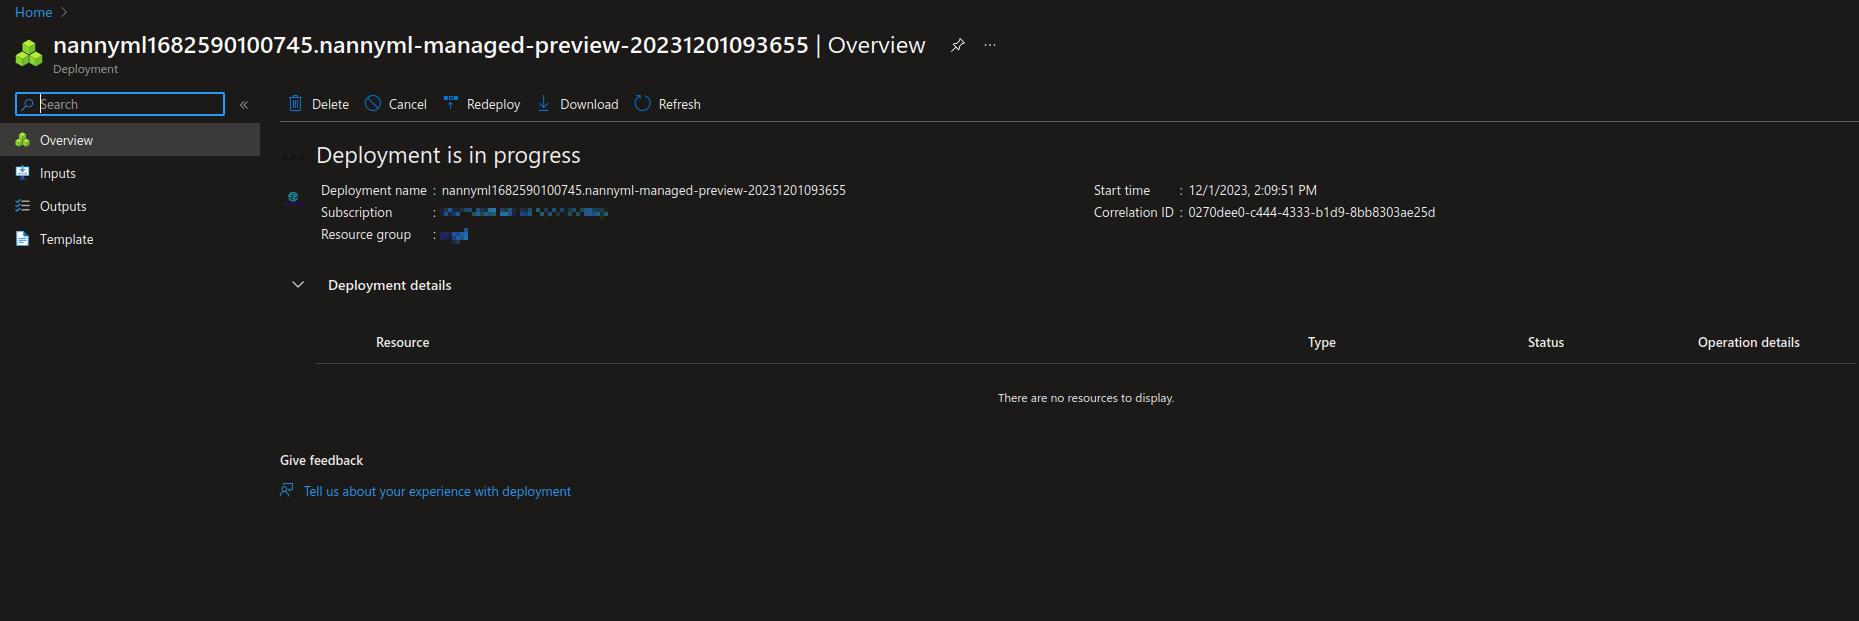
After agreeing to publisher access and fixing any invalid configuration values, the Create button should now be enabled. After clicking it, the deployment begins. You can track progress on the dedicated deployment page. Once it finishes, you'll see a notification appear at the top of the browser window or in your notification overview.
